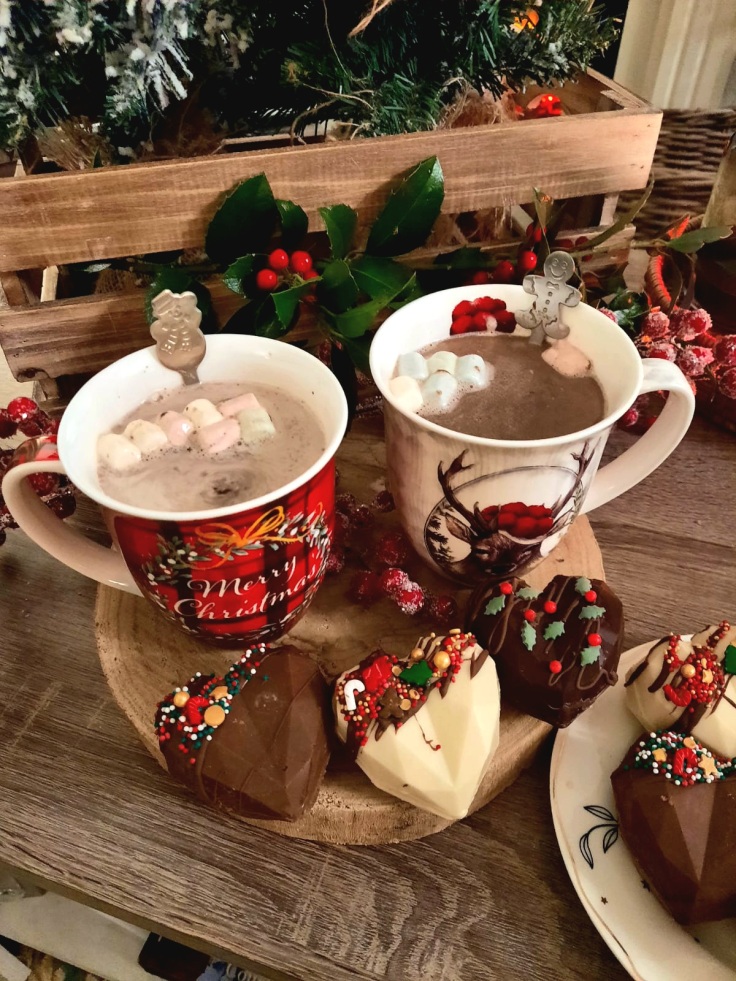
A unique experience. A party in a mug. Fun to make, to receive or to give away. We are talking about the hot chocolate ball! In collaboration with Michelle from Klets&koek we set with the awesome Christmas tip.
The ingredients are fairly simple and you immediately have a fun activity for the whole family.
Ingredients
- 200 gram chocolate (white, milk of pure)
- 4 tbsp choco powder (nesquick)
- Mini marshmellows
- Christmas sprinkles


Necessities
- Saucepan
- Bowl
- Silicone spatula
- Silicone template chocolate ball
- Cookierack
- Plate
- Bakingsheet
- Spoon
- Knife
Making chocolate shapes
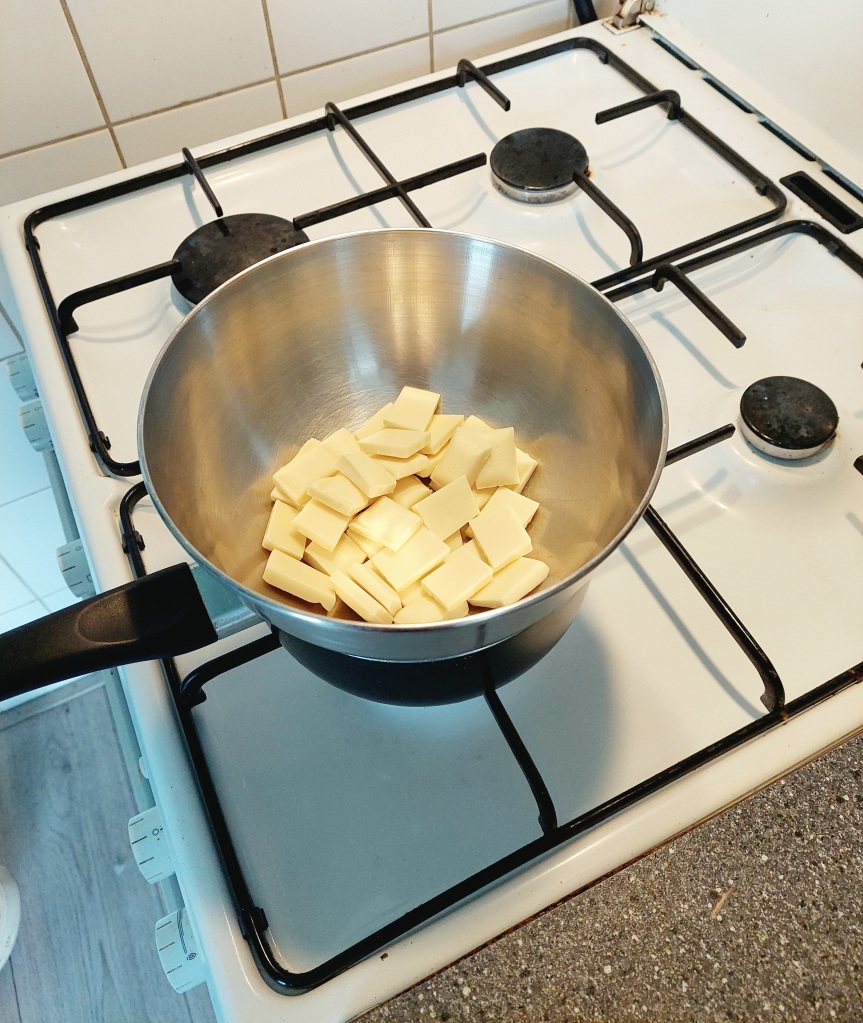
Step 1: the first thing you do is melt the chocolate. Put the saucepan with warm water on a low fire and place the bowl with 15- chocolate on top. Keep some chocolate on the side so you can create the right thickness. Think 3-4 pieces. The water in the pan cannot touch the bowl on top.
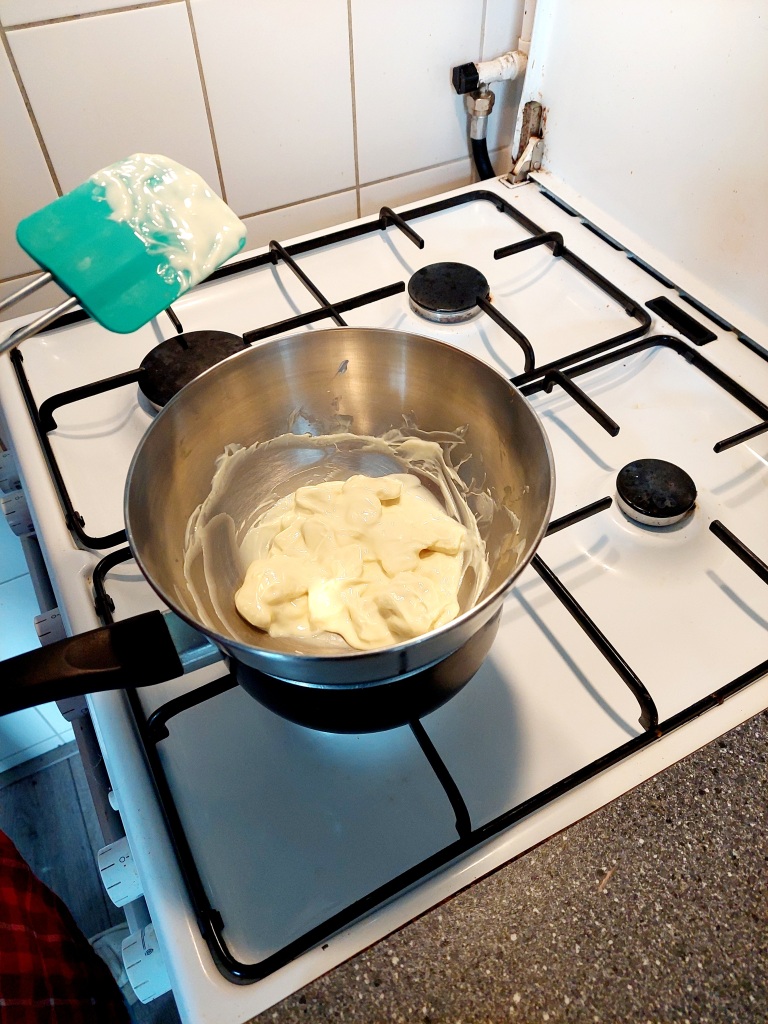

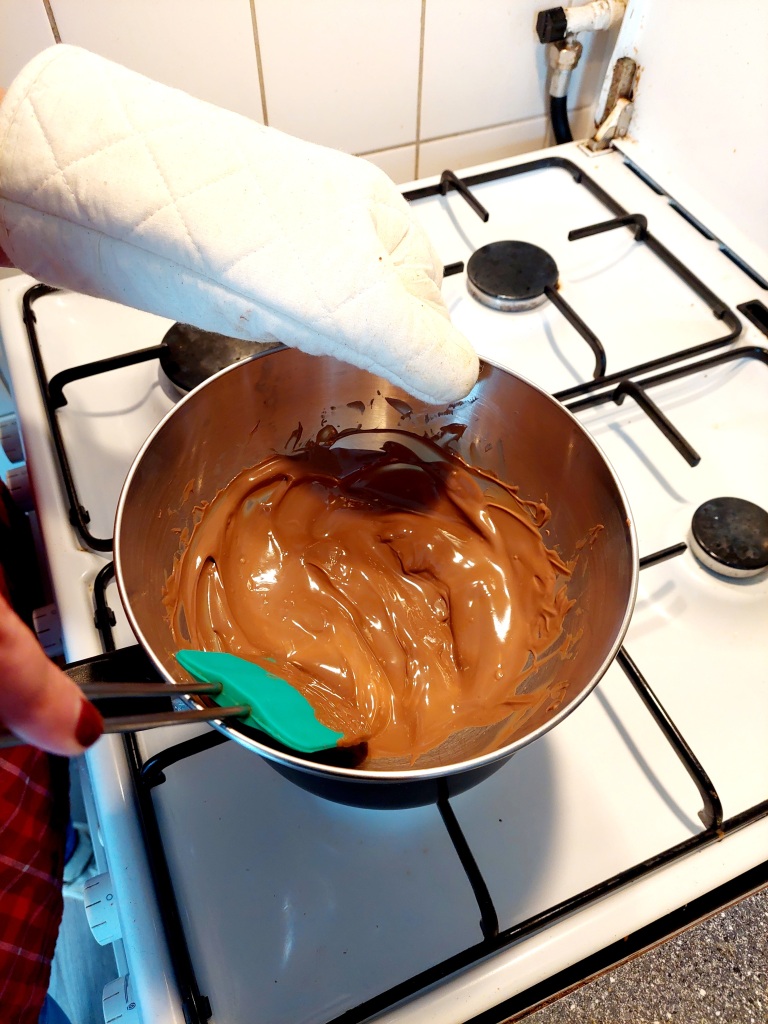
Step 2: When all the chocolate has melted you take the bowl off the pan. Be careful: don’t do this too quickyl! (Think 1-2 that aren’t fully melted). Add the remaining pieces of chocolate one by one. Stir the mixture in the mean time and keep checking the thickness. when you place your pinky in the mixture and it feels like bodytemperature then you are good. It can’t be too warm but also not too cold and the mixture needs to stay liquid. There should be any pieces left in the mixture.


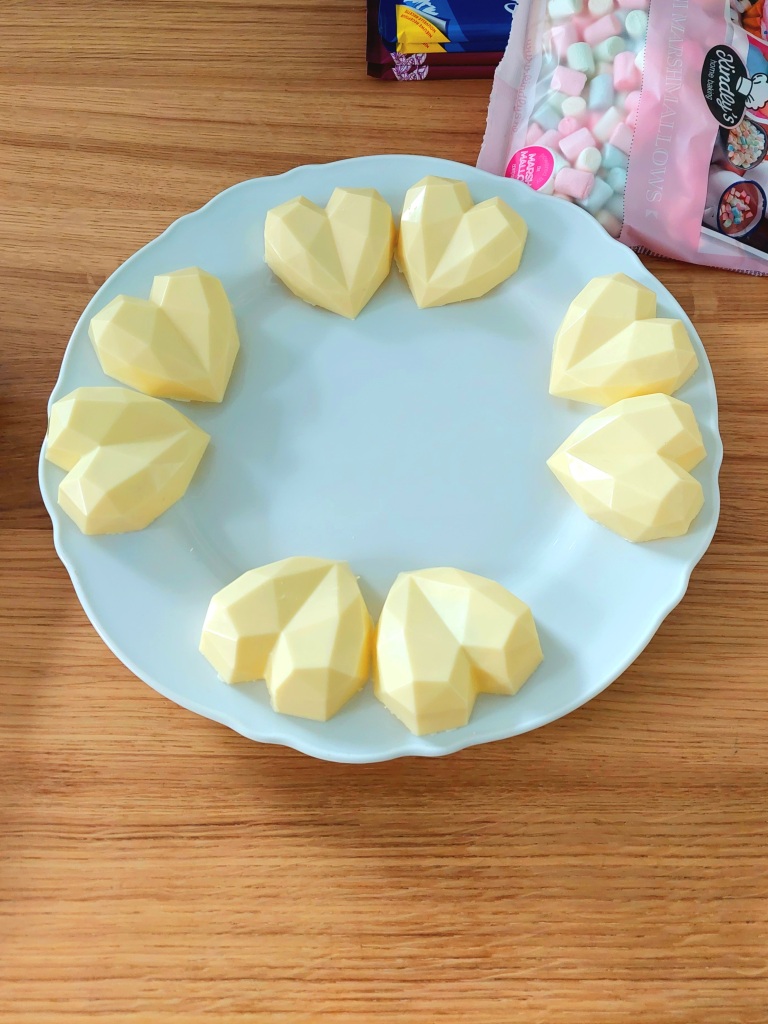
Step 3: Once the chocolate has the right thickness then it’s time to fill the template. For the blog we used a silicone geo heart template but any other template works just as well. Put two spoons of chocolate in the shapes.
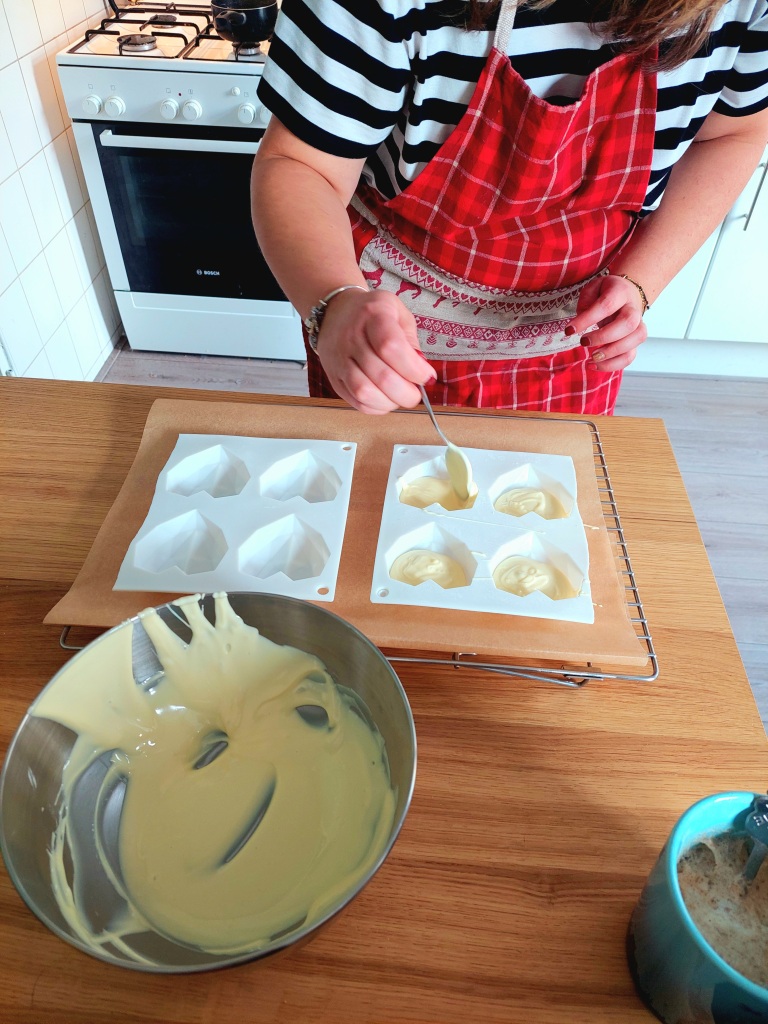
Make sure that every bit of the template is covered in chocolate. Also make sure it’s thick enough. If you don’t have enough chocolate then add another spoonful.
Step 4: Pour the overflowing chocolate back in the bowl by turning the template upside down. Shake it gently if necessary. Use a knife the scrape the edges clean.


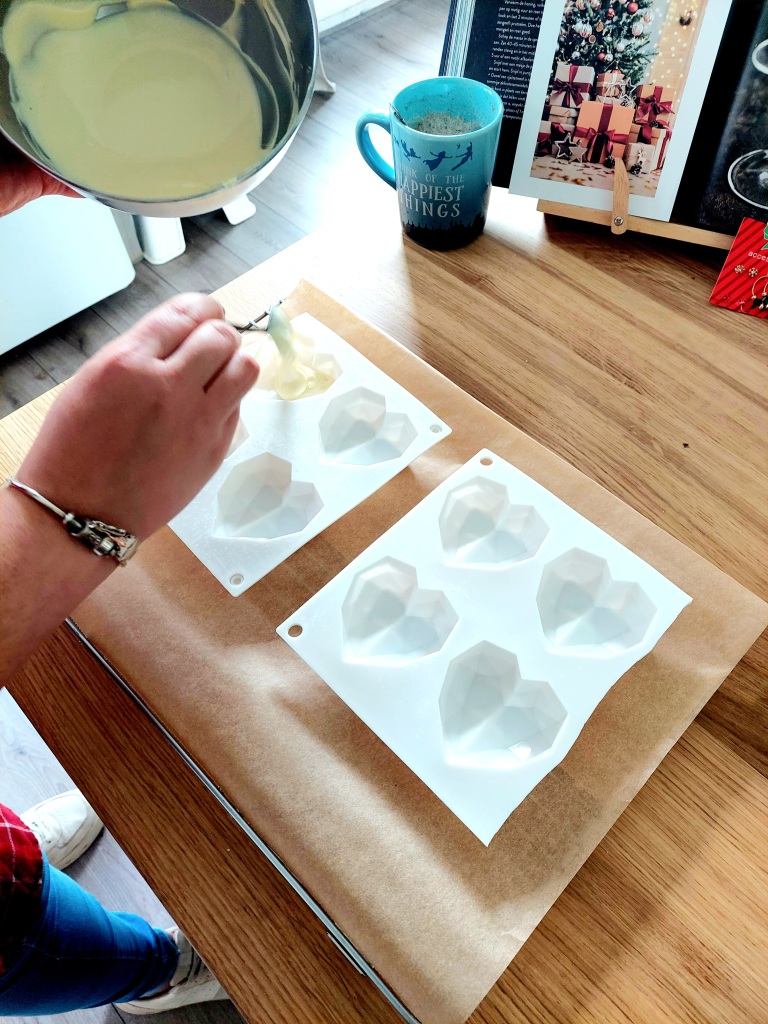
Step 5: Put bakingpaper on your cookierack and place the template on it upside down. Then refrigerate for 20-30 or until the chocolate has hardened.
Chocolate balls
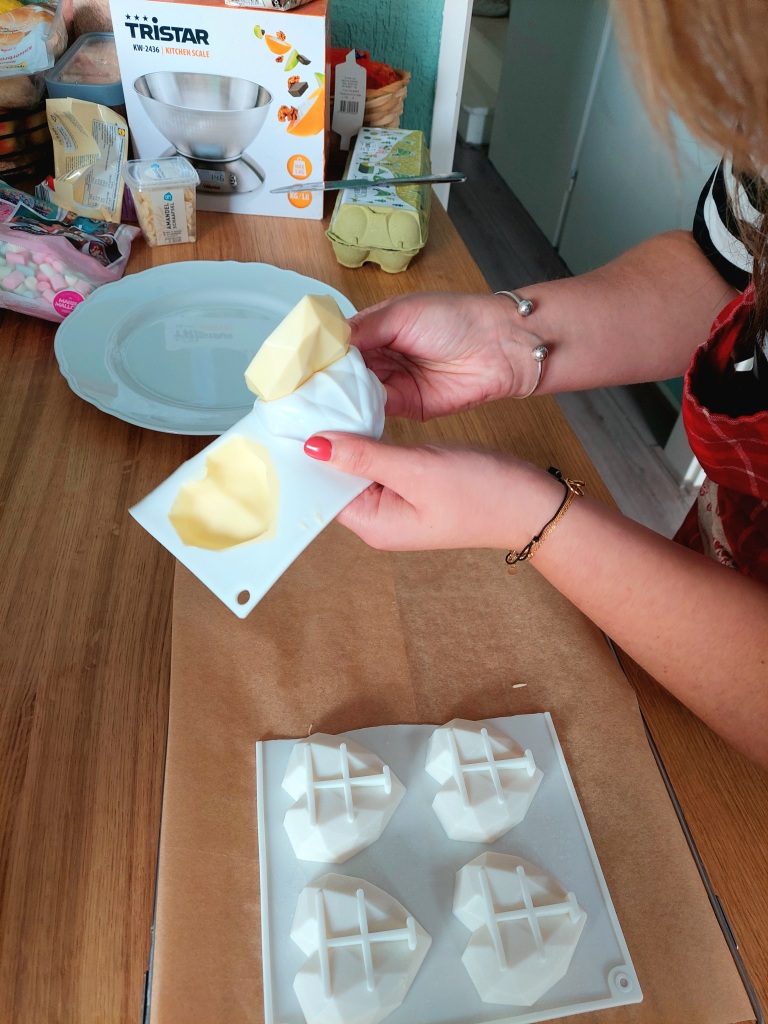
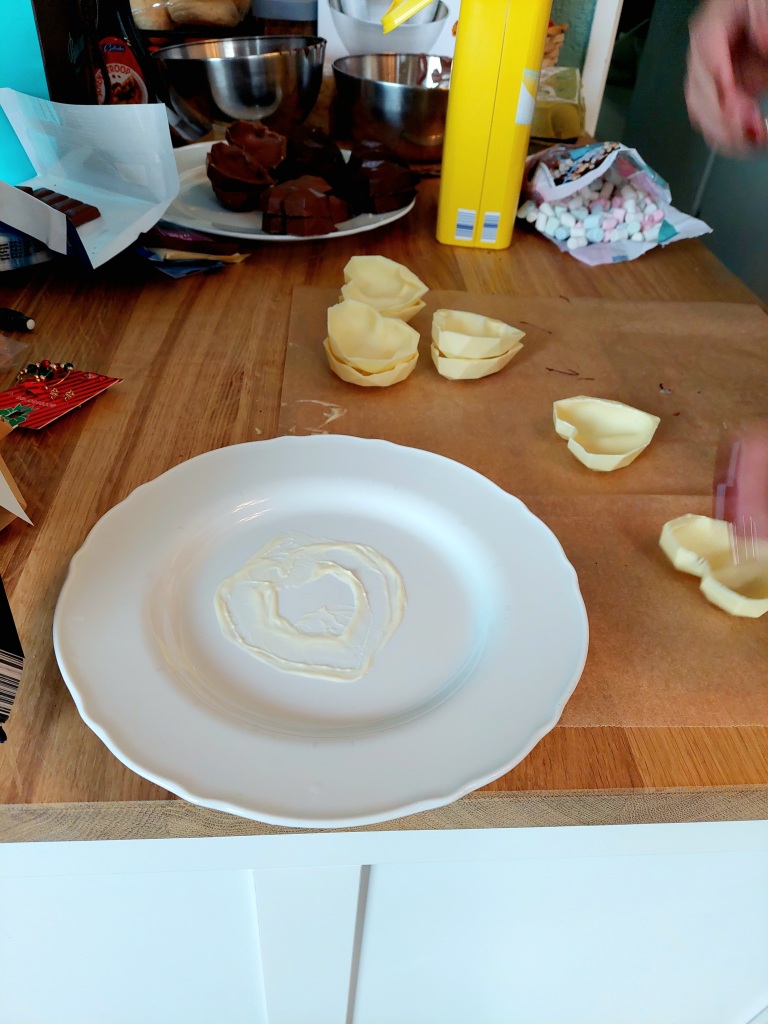
Step 1: Take the template out of the fridge and gentle take the chocolate shapes out. Place them all on the side before you put the balls together.
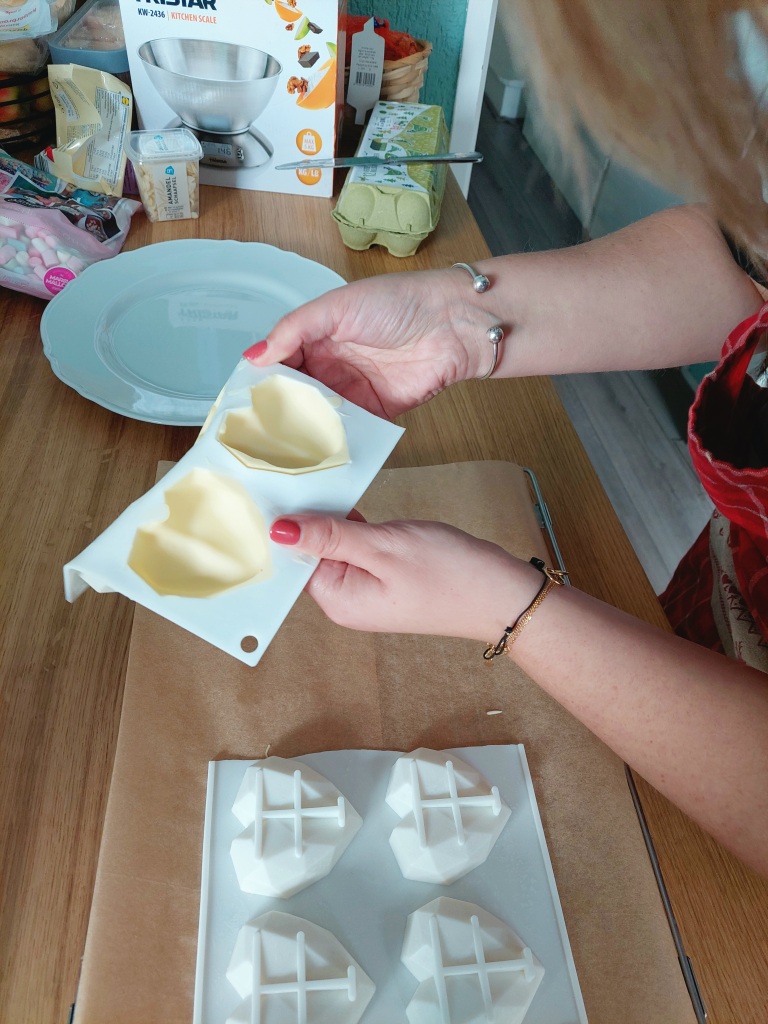
Step 2: Warm a plate in the microwave. If you don’t have a microwave you can also rinse the plate in hot water. Make sure the plate is dried properly. Once the plate is warm and dry place to edges of the shape over it gently so it lightly melts.

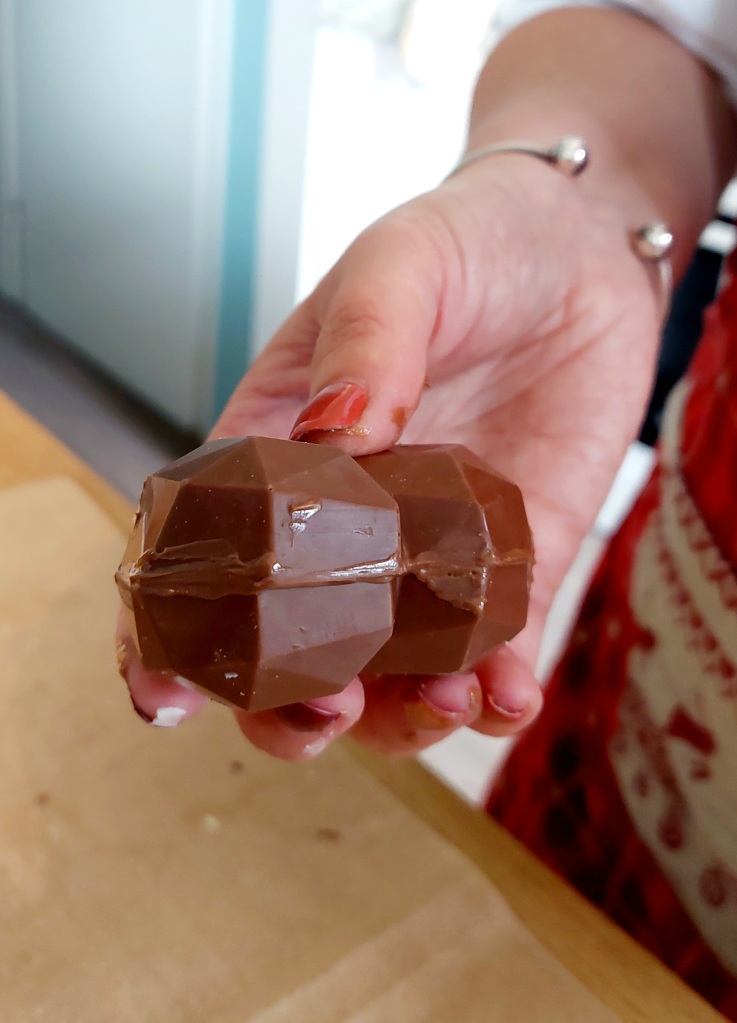
Step 3: Now you are going to speed up a bit. Fill the bottom shape woth a teaspoon of choco powder. Then add some marshmellows on top.


Gently stick the pieces together and use the melted chocolate as glue. Should you find some wholes in your shape, then you can plug them up with the melted chocolate. Do this gently! Let the balls rest until the chocolate has hardened. 5-10 minutes approximately.


Step 4: Finally, you’ll decorate the lot. Melt the remaining chocoalte together and use this as glue. Drizzle the chocolate lightly over the shapes. Don’t make it too thick.


Then decorate the shapes as you which. Let them rest for a bit once you’re done.


Serve or wrap

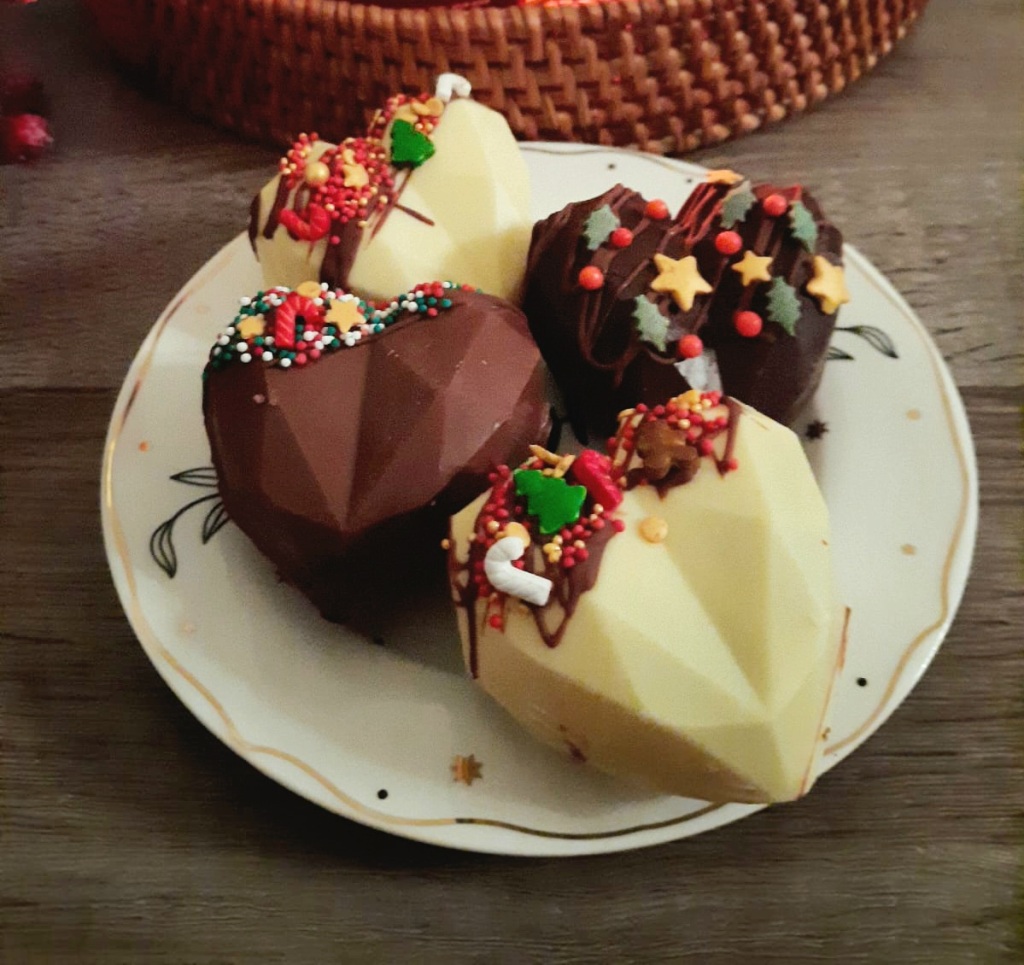
Serve the chocolate balls on a nice plate or wrap them in a box like a present. Isn’t that fun to get?

Are you going to try this? Let us know in a message below.
See you soon,
The Christmas Girls

